
Not every successful game involves shooting aliens or saving the world. Board games, and chess, in particular, have a history that spans thousands of years. Not only are they fun to play, but they’re also fun to port from a real-life board game to a video game.
In this tutorial, you’ll build a 3D chess game in Unity. Along the way, you’ll learn how to:
- Choose which piece to move
- Determine legal moves
- Alternate players
- Detect a win
By the time you’ve finished this tutorial, you’ll have created a feature-rich chess game that you can use as a starting point for other board games.
Getting Started
Download the project materials for this tutorial. You can find a link at the top and the bottom of this page. Open the starter project in Unity to get going.
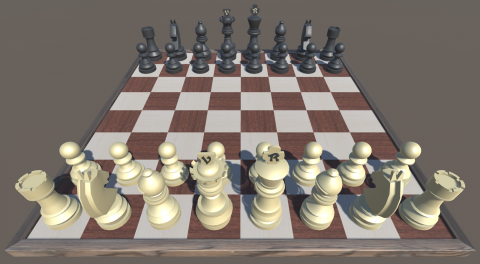
Chess is often implemented as a simple 2D game. However, this version is 3D to mimic sitting at a table playing with your friend. Besides… 3D is cool. =]
Open the Main scene in the Scenes folder. You’ll see a Board object representing the game board and an object for the GameManager. These objects already have scripts attached.
- Prefabs: Includes the board, the individual pieces and the indicator squares that will be used in the move selection process.
- Materials: Includes materials for the chess board, the chess pieces and the tile overlays.
- Scripts: Contains the components that have already been attached to objects in the Hierarchy.
- Board: Keeps track of the visual representations of the pieces. This component also handles the highlighting of individual pieces.
- Geometry.cs: Utility class that handles the conversion between row and column notation and
Vector3points. - Player.cs: Keeps track of the player’s pieces, as well as the pieces a player has captured. It also holds the direction of play for pieces where direction matters, such as pawns.
- Piece.cs: The base class that defines enumerations for any instantiated pieces. It also contains logic to determine the valid moves in the game.
- GameManager.cs: Stores game logic such as allowed moves, the initial arrangement of the pieces at the start of the game and more. It’s a singleton, so it’s easy for other classes to call it.
GameManager stores a 2D array named pieces that tracks where the pieces are located on the board. Take a look at AddPiece, PieceAtGrid and GridForPiece to see how this works.
Enter play mode to view the board and get the pieces set up and ready to go.
Moving Pieces
The first step is figuring out which piece to move.
Raycasting is a way to find out which tile the user is mousing over. If you aren’t familiar with raycasting in Unity, check out our Introduction to Unity Scripting tutorial or our popular Bomberman tutorial.
Once the player selects a piece, you need to generate valid tiles where the piece can move. Then, you need to pick one. You’ll add two new scripts to handle this functionality. TileSelector will help select which piece to move, and MoveSelector will help pick a destination.
Both components have the same basic methods:
Start: For one-time setup.EnterState: Does the setup for this activation.Update: Performs the raycast as the mouse moves.ExitState: Cleans up the current state and callsEnterStateof the next state.
This is a basic implementation of the State Machine pattern. If you need more states, you can make this more formal; however, you’ll add complexity.
Selecting a Tile
Select Board in the Hierarchy. Then, in the Inspector window, click the Add Component button. Now, type TileSelector in the box and click New Script. Finally, click Create and Add to attach the script.
Highlighting the Selected Tile
Double-click TileSelector.cs to open it and add the following variables inside the class definition:
public GameObject tileHighlightPrefab;

private GameObject tileHighlight;
These variables store the transparent overlay to help indicate which tile you’re pointing at. The prefab is assigned in edit mode and the component tracks and moves around the highlight.
Next, add the following lines to Start:
Vector2Int gridPoint = Geometry.GridPoint(0, 0);
Vector3 point = Geometry.PointFromGrid(gridPoint);
tileHighlight = Instantiate(tileHighlightPrefab, point, Quaternion.identity, gameObject.transform);
tileHighlight.SetActive(false);
Start gets an initial row and column for the highlight tile, turns it into a point and creates a game object from the prefab. This object is initially deactivated, so it won’t be visible until it’s needed.
Vector2Int and is referred to as a GridPoint. Vector2Int has two integer values: x and y. When you need to place an object in the scene, you need the Vector3 point. Vector3 has three float values: x, y and z.
Geometry.cs has helper methods for these conversions:
GridPoint(int col, int row): gives you aGridPointfor a given column and row.PointFromGrid(Vector2Int gridPoint): turns aGridPointinto aVector3actual point in the scene.GridFromPoint(Vector3 point): gives theGridPointfor the x and z value of that 3D point, and the y value is ignored.
Next, add EnterState:
public void EnterState()
{
    enabled = true;
}
This re-enables the component when it’s time to select another piece.
Then, add the following to Update:
Ray ray = Camera.main.ScreenPointToRay(Input.mousePosition);

RaycastHit hit;
if (Physics.Raycast(ray, out hit))
{
    Vector3 point = hit.point;
    Vector2Int gridPoint = Geometry.GridFromPoint(point);

    tileHighlight.SetActive(true);
    tileHighlight.transform.position =
        Geometry.PointFromGrid(gridPoint);
}
else
{
    tileHighlight.SetActive(false);
}
Here, you create a Ray from the camera, through the mouse pointer, and off into infinity and beyond!
Physics.Raycast checks to see if this ray intersects any physics colliders in the system. Since the board is the only object with a collider, you don’t have to worry about pieces being hidden by each other.
If the ray intersects a collider, then RaycastHit has the details, including the point of intersection. You turn that intersection point into a GridPoint with the helper method, and then you use that method to set the position of the highlight tile.
Since the mouse pointer is over the board, you also enable the highlight tile, so it’s displayed.
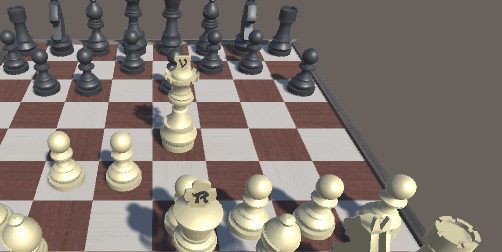
Finally, select Board in the Hierarchy and click Prefabs in the Project window. Then, drag the Selection-Yellow prefab into the Tile Highlight Prefab slot in the Tile Selector component of the board.
Now when you enter play mode, there will be a yellow highlight tile that follows the mouse pointer around.

Selecting the Piece
To select a piece, you need to check if the mouse button is down. Add this check inside the if block, just after the point where you enable the tile highlight:
if (Input.GetMouseButtonDown(0))
{
    GameObject selectedPiece =
        GameManager.instance.PieceAtGrid(gridPoint);
    if(GameManager.instance.DoesPieceBelongToCurrentPlayer(selectedPiece))
    {
        GameManager.instance.SelectPiece(selectedPiece);
    // Reference Point 1: add ExitState call here later
    }
}
If the mouse button is pressed, GameManager provides you the piece at that location. You also have to make sure this piece belongs to the current player since players can’t move their opponent’s pieces.
Board deals only with displaying and highlighting pieces. GameManager keeps track of the GridPoint values of the piece locations. It also has helper methods to answer questions about where pieces are and to which player they belong.
Enter play mode and select a piece.

Now that you have a piece selected, it’s time to move it to a new tile.
Selecting a Move Target
At this point, TileSelector has done its job. It’s time to introduce the other component: MoveSelector.
This component is similar to TileSelector. Just like before, select the Board object in the Hierarchy, add a new component and name it MoveSelector.
Hand Off Control
The first thing you have to manage is how to hand off control from TileSelector to MoveSelector. You can use ExitState for this. In TileSelector.cs, add this method:
private void ExitState(GameObject movingPiece)
{
    this.enabled = false;
    tileHighlight.SetActive(false);
    MoveSelector move = GetComponent<MoveSelector>();
    move.EnterState(movingPiece);
}
This hides the tile overlay and disables the TileSelector component. In Unity, you can’t call the Update method of disabled components. Since you want to call the Update method of the new component now, disabling the old component prevents any interference.
Call this method by adding this line to Update, just after Reference Point 1:
ExitState(selectedPiece);
Now, open MoveSelector and add these instance variables at the top of the class:
public GameObject moveLocationPrefab;
public GameObject tileHighlightPrefab;
public GameObject attackLocationPrefab;

private GameObject tileHighlight;
private GameObject movingPiece;
These hold the mouse highlight, move locations and attack location tile overlays, as well as the instantiated highlight tile and the piece that was selected in the previous step.
Next, add the following set up code to Start:
this.enabled = false;
tileHighlight = Instantiate(tileHighlightPrefab, Geometry.PointFromGrid(new Vector2Int(0, 0)),
    Quaternion.identity, gameObject.transform);
tileHighlight.SetActive(false);
This component has to start in the disabled state, since you need TileSelector to run first. Then, you load the highlight overlay like before.
Move the Piece
Next, add the EnterState method:
public void EnterState(GameObject piece)
{
    movingPiece = piece;
    this.enabled = true;
}
When this method is called, it stores the piece being moved and enables itself.
Add these lines to the Update method of MoveSelector:
Ray ray = Camera.main.ScreenPointToRay(Input.mousePosition);

RaycastHit hit;
if (Physics.Raycast(ray, out hit))
{
    Vector3 point = hit.point;
    Vector2Int gridPoint = Geometry.GridFromPoint(point);

    tileHighlight.SetActive(true);
    tileHighlight.transform.position = Geometry.PointFromGrid(gridPoint);
    if (Input.GetMouseButtonDown(0))
    {
        // Reference Point 2: check for valid move location
        if (GameManager.instance.PieceAtGrid(gridPoint) == null)
        {
            GameManager.instance.Move(movingPiece, gridPoint);
        }
        // Reference Point 3: capture enemy piece here later
        ExitState();
    }
}
else
{
    tileHighlight.SetActive(false);
}
Update in this case is similar to TileSelector and uses the same Raycast check to see what tile the mouse is over. However, this time when the mouse button is clicked, you call GameManager to move the piece to the new tile.
Finally, add the ExitState method to clean up and prepare for the next move:
private void ExitState()
{
    this.enabled = false;
    tileHighlight.SetActive(false);
    GameManager.instance.DeselectPiece(movingPiece);
    movingPiece = null;
    TileSelector selector = GetComponent<TileSelector>();
    selector.EnterState();
}
You disable this component and hide the tile highlight overlay. Since the piece has moved, you can clear that value, and ask the GameManager to unhighlight the piece. Then, you call EnterState on TileSelector to start the process all over again.
Back in the editor, with Board selected, drag the tile overlay prefabs from the prefab folder to the slots in MoveSelector:
- Move Location Prefab should be
Selection-Blue - Tile Highlight Prefab should be
Selection-Yellow. - Attack Location Prefab should be
Selection-Red
.

You can tweak the colors by adjusting the materials.
Start play mode and move some pieces around.

You’ll notice that you can move pieces to any unoccupied location. That can make for a very confusing game of chess! The next step is to make sure pieces move according to the rules of the game.
Finding Legal Moves
In Chess, each piece has different movements it can legally make. Some can move in any direction, some can move any number of spaces, and some can only move in one direction. How do you keep track of all the options?
One way is to have an abstract base class that represents all pieces, and then have concrete subclasses override a method to generate move locations.
Another question to answer is: “Where should you generate the list of moves?”
One place that makes sense is EnterState in MoveSelector. This is where you generate overlay tiles to show the player where they can move, so it makes the most sense.
Generate List of Valid Targets
The general strategy is to take the selected piece and ask GameManager for a list of valid targets (a.k.a. moves). GameManager will use the piece subclass to generate a list of possible targets. Then, it will filter out positions that are off the board or occupied.
This filtered list is passed back to MoveSelector, which highlights the legal moves and waits for the player’s selection.
The pawn has the most basic move, so it makes sense to start there.
Open Pawn.cs in Pieces, and modify MoveLocations so that it looks like this:
public override List MoveLocations(Vector2Int gridPoint)
{
    var locations = new List<Vector2Int>();

    int forwardDirection = GameManager.instance.currentPlayer.forward;
    Vector2Int forward = new Vector2Int(gridPoint.x, gridPoint.y + forwardDirection);
    if (GameManager.instance.PieceAtGrid(forward) == false)
    {
        locations.Add(forward);
    }

    Vector2Int forwardRight = new Vector2Int(gridPoint.x + 1, gridPoint.y + forwardDirection);
    if (GameManager.instance.PieceAtGrid(forwardRight))
    {
        locations.Add(forwardRight);
    }

    Vector2Int forwardLeft = new Vector2Int(gridPoint.x - 1, gridPoint.y + forwardDirection);
    if (GameManager.instance.PieceAtGrid(forwardLeft))
    {
        locations.Add(forwardLeft);
    }

    return locations;
}
This does several things:
This code first creates an empty list to store locations. Next, it creates a location representing “forward” one square.
Since the white and black pawns move in different directions, the Player object stores a value representing which way the pawns can move. For one player this value is +1, while the value is -1 for the opponent.
Pawns have a peculiar movement profile and several special rules. Although they can move forward one square, they can’t capture an opposing piece in that square; they can only capture on the forward diagonals. Before adding the forward tile as a valid location, you have to check to see if there’s already another piece occupying that spot. If not, you can add the forward tile to the list.
For the capture spots, again, you have to check to see if there’s already a piece at that location. If there is, you can capture it.
You don’t need to worry just yet about checking if it’s the player’s or the opponent’s piece — you’ll work that out later.
In GameManager.cs, add this method just after the Move method:
public List MovesForPiece(GameObject pieceObject)
{
    Piece piece = pieceObject.GetComponent();
    Vector2Int gridPoint = GridForPiece(pieceObject);
    var locations = piece.MoveLocations(gridPoint);

    // filter out offboard locations
    locations.RemoveAll(tile => tile.x < 0 || tile.x > 7
        || tile.y < 0 || tile.y > 7);

    // filter out locations with friendly piece
    locations.RemoveAll(tile => FriendlyPieceAt(tile));

    return locations;
}
Here, you get the Piece component from the game piece, as well as its current location.
Next, you ask GameManager for a list of locations for this piece and filter out any invalid values.
RemoveAll is a useful function that uses a callback expression. This method looks at each value in the list, passing it into an expression as tile. If that expression evaluates to true, then the value is removed from the list.
This first expression removes locations with an x or y value that would place the piece off of the board. The second filter is similar, but it removes any locations that have a friendly piece.
In MoveSelector.cs, add these instance variables at the top of the class:
private List<Vector2Int> moveLocations;
private List<GameObject> locationHighlights;
The first stores a list of GridPoint values for move locations; the second stores a list of overlay tiles showing whether the player can move to that location.
Add the following to the bottom of the EnterState method:
moveLocations = GameManager.instance.MovesForPiece(movingPiece);
locationHighlights = new List<GameObject>();

foreach (Vector2Int loc in moveLocations)
{
    GameObject highlight;
    if (GameManager.instance.PieceAtGrid(loc))
    {
        highlight = Instantiate(attackLocationPrefab, Geometry.PointFromGrid(loc),
            Quaternion.identity, gameObject.transform);
    }
    else
    {
        highlight = Instantiate(moveLocationPrefab, Geometry.PointFromGrid(loc),
            Quaternion.identity, gameObject.transform);
    }
    locationHighlights.Add(highlight);
}
This section does several things:
First, it gets a list of valid locations from the GameManager and makes an empty list to store the tile overlay objects. Next, it loops over each location in the list. If there is already a piece at that location, then it must be an enemy piece, because the friendly ones were already filtered out.
Enemy locations get the attack overlay, and the remainder get the move overlay.
Execute the Move
Add this section below Reference Point 2, inside the if statement checking the mouse button:
if (!moveLocations.Contains(gridPoint))
{
    return;
}
If the player clicks on a tile that isn’t a valid move, exit from this function.
Finally, in MoveSelector.cs, add this code to the end of ExitState:
foreach (GameObject highlight in locationHighlights)
{
    Destroy(highlight);
}
At this point, the player has selected a move so you can remove the overlay objects.

Whew! Those were a lot of code changes just to get the pawns to move. Now that you’ve done all the hard work, it’ll be easy to move the other pieces.
Next Player
It’s not much of a game if only one side gets to move. It’s time to fix that!
To let both players play, you’ll have to figure out how to switch between players and where to add the code.
Since GameManager is responsible for all of the game rules, it makes the most sense to put the switching code there.
The actual switch is straightforward. There are variables for the current and other player in GameManager, so you just need to swap those values.
The trickier question is: where do you call the swap?
A player’s turn is over once they have moved a piece. ExitState in MoveSelector is called after the selected piece is moved, so that seems like the right place to do the switch.
In GameManager.cs, add the following method to the end of the class:
public void NextPlayer()
{
    Player tempPlayer = currentPlayer;
    currentPlayer = otherPlayer;
    otherPlayer = tempPlayer;
}
Swapping two values requires a third variable to act as a placeholder; otherwise, you’d overwrite one of the values before it can be copied.
Switch over to MoveSelector.cs and add the following line to ExitState, right before the call to EnterState:
GameManager.instance.NextPlayer();
That’s it! ExitState and EnterState already take care of their own cleanup.
Enter play mode, and you can now move pieces for both sides. You’re getting close to a real game at this point

Capturing Pieces
Capturing pieces is an important part of chess. As the saying goes, “It’s all fun and games until someone loses a Knight”.
Since the game rules go in GameManager, open that and add the following method:
public void CapturePieceAt(Vector2Int gridPoint)
{
    GameObject pieceToCapture = PieceAtGrid(gridPoint);
    currentPlayer.capturedPieces.Add(pieceToCapture);
    pieces[gridPoint.x, gridPoint.y] = null;
    Destroy(pieceToCapture);
}
Here, GameManager looks up which piece is at the target location. This piece is added to the list of captured pieces for the current player. Next, it’s cleared from GameManager‘s record of the board tiles and GameObject is destroyed, which removes it from the scene.
To capture a piece, you move on top of it. So the code to call this step should go in MoveSelector.cs.
In Update, find the Reference Point 3 comment and replace it with the following statement:
else
{
    GameManager.instance.CapturePieceAt(gridPoint);
    GameManager.instance.Move(movingPiece, gridPoint);
}
The previous if statement checked to see if there was a piece at the target location. Since the earlier move generation filtered out tiles with friendly pieces, a tile that contains a piece must be an enemy piece.
After the enemy piece is gone, the selected piece can move in.
Click on play and move the pawns around until you can capture one.
I am the Queen, you captured my pawn, prepare to die.
Ending the Game
A chess game ends when a player captures the opposing King. When you capture a piece, check to see if it’s a King. If so, the game is over.
But how do you stop the game? One way is to remove both the TileSelector and MoveSelector scripts on the board.
In GameManager.cs, in CapturePieceAt, add the following lines before you destroy the captured piece:
if (pieceToCapture.GetComponent<Piece>().type == PieceType.King)
{
    Debug.Log(currentPlayer.name + " wins!");
    Destroy(board.GetComponent<TileSelector>());
    Destroy(board.GetComponent<MoveSelector>());
}
It’s not enough to disable these components. The next ExitState and EnterState calls will only re-enable one of them, which will keep the game going.
Destroy is not just for GameObject classes; it can be used to remove a component attached to an object as well.
Hit play. Manouever a pawn and take the enemy king. You’ll see a win message printed to the Unity console.
As a personal challenge, you can add UI elements to display a “Game Over” message or transition back to a menu screen.

Now it’s time to bring out the big guns and move the more powerful pieces!
Special Movement
Piece and its specific subclasses are an excellent way to encapsulate the special movement rules.
You can use techniques from Pawn to add movement to some of the other pieces. Pieces that move a single space in different directions, such as the King and Knight, are set up in the same way. See if you can implement those movement rules.
Have a look at the finished project code if you need a hint.
Moving Multiple Spaces
Pieces that can move multiple spaces in one direction are more challenging. These are the Bishop, Rook and Queen pieces. The Bishop is easier to demonstrate, so let’s start with that one.
Piece has premade lists of the directions the Bishop and Rook can move as a starting point. These are all directions from the current tile location of the piece.
Open Bishop.cs, and replace MoveLocations with this:
public override List<Vector2Int> MoveLocations(Vector2Int gridPoint)
{
    List<Vector2Int> locations = new List<Vector2Int>();

    foreach (Vector2Int dir in BishopDirections)
    {
        for (int i = 1; i < 8; i++)
        {
            Vector2Int nextGridPoint = new Vector2Int(gridPoint.x + i * dir.x, gridPoint.y + i * dir.y);
            locations.Add(nextGridPoint);
            if (GameManager.instance.PieceAtGrid(nextGridPoint))
            {
                break;
            }
        }
    }

    return locations;
}
The foreach loops over each direction. For each direction, there is a second loop that generates enough new locations to move the piece off the board. Since the list of locations will be filtered for off-board locations, you just need enough to make sure you don’t miss any tiles.
In each step, generate a GridPoint for the location and add it to the list. Then check to see if that location currently has a piece. If it does, break out of the inner loop to go to the next direction.
The break is included because an existing piece will block further movement. Again, later in the chain, you filter out locations with friendly pieces, so you don’t have to worry about that here.
For chess, this only matters for pawns, but other games might require that distinction.
That’s it! Hit play mode and try it out.

Moving the Queen
The Queen is the most powerful piece, so that’s an excellent place to finish.
The Queen’s movement is a combination of the Bishop and Rook; the base class has an array of directions for each piece. It would be helpful if you could combine the two.
In Queen.cs, replace MoveLocations with the following:
public override List<Vector2Int> MoveLocations(Vector2Int gridPoint)
{
    List<Vector2Int> locations = new List<Vector2Int>();
    List<Vector2Int> directions = new List<Vector2Int>(BishopDirections);
    directions.AddRange(RookDirections);

    foreach (Vector2Int dir in directions)
    {
        for (int i = 1; i < 8; i++)
        {
            Vector2Int nextGridPoint = new Vector2Int(gridPoint.x + i * dir.x, gridPoint.y + i * dir.y);
            locations.Add(nextGridPoint);
            if (GameManager.instance.PieceAtGrid(nextGridPoint))
            {
                break;
            }
        }
    }

    return locations;
}
The only thing that’s different here is that you’re turning the direction array into a List.
The advantage of the List is that you can add the directions from the other array, making one List with all of the directions. The rest of the method is the same as the Bishop code.
Hit play again, and get the pawns out of the way to make sure everything works.
Where to Go From Here?
There are several things you can do at this point, like finish the movement for the King, Knight and Rook. If you’re stuck at any point, check out the final project code in the project materials download.
There are a few special rules that are not implemented here, such as allowing a Pawn’s first move to be two spaces instead of just one, castling and a few others.
The general pattern is to add variables and methods to GameManager to keep track of those situations and check if they’re available when the piece is moving. If available, then add the appropriate locations in MoveLocations for that piece.
There are also visual enhancements you can make. For example, the pieces can move smoothly to their target location or the camera can rotate to show the other player’s view during their turn.
If you have any questions or comments, or just want to show off your cool 3D chess game, join the discussion below!
The post How to Make a Chess Game with Unity appeared first on Ray Wenderlich.
How to Make a Chess Game with Unity published first on https://medium.com/@koresol
