Update note: This SpriteKit tutorial has been updated for Xcode 9.3 and Swift 4.1 by Kevin Colligan. The original tutorial was written by Matthijs Hollemans and subsequently updated by Morten Faarkrog.
Welcome back to our “How to Make a Game Like Candy Crush” tutorial with SpriteKit and Swift series.
- In the first part, you toured the starter project, built the game foundation and wrote the logic for loading levels.
- (You’re here) In the second part, you’ll focus on detecting swipes and swapping cookies.
- In the third part, you’ll work on finding and removing chains, refilling the board and keeping score.
This tutorial picks up where you left off in the last part. Use the Download Materials button at the top or bottom of this tutorial to download the starter project if you need it.
Add Swipe Gestures
In Cookie Crunch Adventure, you want the player to be able to swap two cookies by swiping left, right, up or down.
Detecting swipes is a job for GameScene. If the player touches a cookie on the screen, it might be the start of a valid swipe motion. Which cookie to swap with the touched cookie depends on the direction of the swipe.
To recognize the swipe motion, you’ll use the touchesBegan, touchesMoved and touchesEnded methods from GameScene.
Go to GameScene.swift and add two private properties to the class:
private var swipeFromColumn: Int?
private var swipeFromRow: Int?
These properties record the column and row numbers of the cookie that the player first touched when she started her swipe movement. These are implicitly initialized to nil, as they are optionals.
You first need to add a new convertPoint(_:) method. It’s the opposite of pointFor(column:, row:), so add this right below it.
private func convertPoint(_ point: CGPoint) -> (success: Bool, column: Int, row: Int) {
  if point.x >= 0 && point.x < CGFloat(numColumns) * tileWidth &&
    point.y >= 0 && point.y < CGFloat(numRows) * tileHeight {
    return (true, Int(point.x / tileWidth), Int(point.y / tileHeight))
  } else {
    return (false, 0, 0)  // invalid location
  }
}
This method takes a CGPoint that is relative to the cookiesLayer and converts it into column and row numbers. The return value of this method is a tuple with three values: 1) the boolean that indicates success or failure; 2) the column number; and 3) the row number. If the point falls outside the grid, this method returns false for success.
Now add touchesBegan(_:with:):
override func touchesBegan(_ touches: Set<UITouch>, with event: UIEvent?) {
  // 1
  guard let touch = touches.first else { return }
  let location = touch.location(in: cookiesLayer)
  // 2
  let (success, column, row) = convertPoint(location)
  if success {
    // 3
    if let cookie = level.cookie(atColumn: column, row: row) {
      // 4
      swipeFromColumn = column
      swipeFromRow = row
    }
  }
}
The game will call touchesBegan(_:with:) whenever the user puts her finger on the screen. Here’s what the method does, step by step:
- It converts the touch location, if any, to a point relative to the
cookiesLayer. - Then, it finds out if the touch is inside a square on the level grid by calling
convertPoint(_:). If so, this might be the start of a swipe motion. At this point, you don’t know yet whether that square contains a cookie, but at least the player put her finger somewhere inside the 9×9 grid. - Next, the method verifies that the touch is on a cookie rather than on an empty square. You’ll get a warning here about
cookiebeing unused, but you’ll need it later so ignore the warning. - Finally, it records the column and row where the swipe started so you can compare them later to find the direction of the swipe.
To perform a valid swipe, the player also has to move her finger out of the current square. You’re only interested in the general direction of the swipe, not the exact destination.
The logic for detecting the swipe direction goes into touchesMoved(_:with:), so add this method next:
override func touchesMoved(_ touches: Set<UITouch>, with event: UIEvent?) {
  // 1
  guard swipeFromColumn != nil else { return }

  // 2
  guard let touch = touches.first else { return }
  let location = touch.location(in: cookiesLayer)

  let (success, column, row) = convertPoint(location)
  if success {

    // 3
    var horizontalDelta = 0, verticalDelta = 0
    if column < swipeFromColumn! {          // swipe left
      horizontalDelta = -1
    } else if column > swipeFromColumn! {   // swipe right
      horizontalDelta = 1
    } else if row < swipeFromRow! {         // swipe down
      verticalDelta = -1
    } else if row > swipeFromRow! {         // swipe up
      verticalDelta = 1
    }

    // 4
    if horizontalDelta != 0 || verticalDelta != 0 {
      trySwap(horizontalDelta: horizontalDelta, verticalDelta: verticalDelta)

      // 5
      swipeFromColumn = nil
    }
  }
}
Here is what this does:
- If
swipeFromColumnis nil, then either the swipe began outside the valid area or the game has already swapped the cookies and you need to ignore the rest of the motion. You could keep track of this in a separate boolean but usingswipeFromColumnis just as easy; that’s why you made it an optional. - This is similar to what
touchesBegan(_:with:)does to calculate the row and column numbers currently under the player’s finger. - Here the method figures out the direction of the player’s swipe by simply comparing the new column and row numbers to the previous ones. Note that you’re not allowing diagonal swipes. Since you’re using
else ifstatements, only one ofhorizontalDeltaorverticalDeltawill be set. trySwap(horizontalDelta:verticalDelta:)is called only if the player swiped out of the old square.- By setting
swipeFromColumnback tonil, the game will ignore the rest of this swipe motion.
The hard work of cookie swapping goes into a new method:
private func trySwap(horizontalDelta: Int, verticalDelta: Int) {
  // 1
  let toColumn = swipeFromColumn! + horizontalDelta
  let toRow = swipeFromRow! + verticalDelta
  // 2
  guard toColumn >= 0 && toColumn < numColumns else { return }
  guard toRow >= 0 && toRow < numRows else { return }
  // 3
  if let toCookie = level.cookie(atColumn: toColumn, row: toRow),
    let fromCookie = level.cookie(atColumn: swipeFromColumn!, row: swipeFromRow!) {
    // 4
    print("*** swapping \(fromCookie) with \(toCookie)")
  }
}
This is called “try swap” for a reason. At this point, you only know that the player swiped up, down, left or right, but you don’t yet know if there is a cookie to swap in that direction.
- You calculate the column and row numbers of the cookie to swap with.
- It is possible that the
toColumnortoRowis outside the 9×9 grid. This can occur when the user swipes from a cookie near the edge of the grid. The game should ignore such swipes. - The final check is to make sure that there is actually a cookie at the new position. You can’t swap if there’s no second cookie! This happens when the user swipes into a gap where there is no tile.
- When you get here, it means everything is OK and this is a valid swap! For now, you log both cookies to the Xcode console.
For completeness’s sake, you should also implement touchesEnded(_:with:), which is called when the user lifts her finger from the screen, and touchesCancelled(_:with:), which happens when iOS decides that it must interrupt the touch (for example, because of an incoming phone call).
Add the following:
override func touchesEnded(_ touches: Set<UITouch>, with event: UIEvent?) {
  swipeFromColumn = nil
  swipeFromRow = nil
}

override func touchesCancelled(_ touches: Set<UITouch>, with event: UIEvent?) {
  touchesEnded(touches, with: event)
}
If the gesture ends, regardless of whether it was a valid swipe, you reset the starting column and row numbers to nil.
Build and run, and try out different swaps:

You won’t see anything happen in the game yet, but the debug pane logs your attempts to make a valid swap.
Animating the Swaps
To describe the swapping of two cookies, you’ll create a new type: Swap. This is another model object whose only purpose it is to say, “The player wants to swap cookie A with cookie B.”
Create a new Swift File named Swap.swift. Replace its contents with the following:
struct Swap: CustomStringConvertible {
  let cookieA: Cookie
  let cookieB: Cookie

  init(cookieA: Cookie, cookieB: Cookie) {
    self.cookieA = cookieA
    self.cookieB = cookieB
  }

  var description: String {
    return "swap \(cookieA) with \(cookieB)"
  }
}
Now that you have an object that can describe an attempted swap, the question becomes: Who will handle the logic of actually performing the swap? The swipe detection logic happens in GameScene, but all the real game logic so far is in GameViewController.
That means GameScene must have a way to communicate back to GameViewController that the player performed a valid swipe and that a swap must be attempted. One way to communicate is through a delegate protocol, but since this is the only message that GameScene must send back to GameViewController, you’ll use a closure.
Add the following property to the top of GameScene.swift:
var swipeHandler: ((Swap) -> Void)?
The type of this variable is ((Swap) -> Void)?. Because of the -> you can tell this is a closure or function. This closure or function takes a Swap object as its parameter and does not return anything.
It’s the scene’s job to handle touches. If it recognizes that the user made a swipe, it will call the closure that’s stored in the swipe handler. This is how it communicates back to the GameViewController that a swap needs to take place.
Still in GameScene.swift, add the following code to the bottom of trySwap(horizontal:vertical:), replacing the print() statement:
if let handler = swipeHandler {
  let swap = Swap(cookieA: fromCookie, cookieB: toCookie)
  handler(swap)
}
This creates a new Swap object, fills in the two cookies to be swapped and then calls the swipe handler to take care of the rest. Because swipeHandler can be nil, you use optional binding to get a valid reference first.
GameViewController will decide whether the swap is valid; if it is, you’ll need to animate the two cookies. Add the following method to do this in GameScene.swift:
func animate(_ swap: Swap, completion: @escaping () -> Void) {
  let spriteA = swap.cookieA.sprite!
  let spriteB = swap.cookieB.sprite!

  spriteA.zPosition = 100
  spriteB.zPosition = 90

  let duration: TimeInterval = 0.3

  let moveA = SKAction.move(to: spriteB.position, duration: duration)
  moveA.timingMode = .easeOut
  spriteA.run(moveA, completion: completion)

  let moveB = SKAction.move(to: spriteA.position, duration: duration)
  moveB.timingMode = .easeOut
  spriteB.run(moveB)

  run(swapSound)
}
This is basic SKAction animation code: You move cookie A to the position of cookie B and vice versa.
The cookie that was the origin of the swipe is in cookieA and the animation looks best if that one appears on top, so this method adjusts the relative zPosition of the two cookie sprites to make that happen.
After the animation completes, the action on cookieA calls a completion block so the caller can continue doing whatever it needs to do. That’s a common pattern for this game: The game waits until an animation is complete and then it resumes.
Now that you’ve handled the view, there’s still the model to deal with before getting to the controller! Open Level.swift and add the following method:
func performSwap(_ swap: Swap) {
  let columnA = swap.cookieA.column
  let rowA = swap.cookieA.row
  let columnB = swap.cookieB.column
  let rowB = swap.cookieB.row

  cookies[columnA, rowA] = swap.cookieB
  swap.cookieB.column = columnA
  swap.cookieB.row = rowA

  cookies[columnB, rowB] = swap.cookieA
  swap.cookieA.column = columnB
  swap.cookieA.row = rowB
}
This first makes temporary copies of the row and column numbers from the Cookie objects because they get overwritten. To make the swap, it updates the cookies array, as well as the column and row properties of the Cookie objects, which shouldn’t go out of sync. That’s it for the data model.
Go to GameViewController.swift and add the following method:
func handleSwipe(_ swap: Swap) {
  view.isUserInteractionEnabled = false

  level.performSwap(swap)
  scene.animate(swap) {
    self.view.isUserInteractionEnabled = true
  }
}
You first tell the level to perform the swap, which updates the data model and then, tell the scene to animate the swap, which updates the view. Over the course of this tutorial, you’ll add the rest of the gameplay logic to this function.
While the animation is happening, you don’t want the player to be able to touch anything else, so you temporarily turn off isUserInteractionEnabled on the view. You turn it back on in the completion block that is passed to animate(_:completion:).
Also add the following line to viewDidLoad(), just before the line that presents the scene:
scene.swipeHandler = handleSwipe
This assigns the handleSwipe(_:) function to GameScene’s swipeHandler property. Now whenever GameScene calls swipeHandler(swap), it actually calls a function in GameViewController.
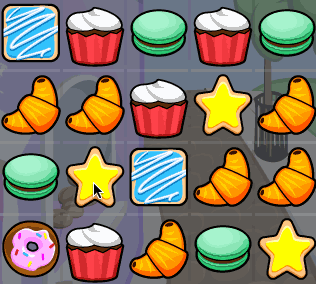
Build and run the app. You can now swap the cookies! Also, try to make a swap across a gap — it won’t work!
Highlighting the Cookies
In Candy Crush Saga, the candy you swipe lights up for a brief moment. You can achieve this effect in Cookie Crunch Adventure by placing a highlight image on top of the sprite.
The texture atlas has highlighted versions of the cookie sprites that are brighter and more saturated. The CookieType enum already has a function to return the name of this image.
Time to improve GameScene by adding this highlighted cookie on top of the existing cookie sprite. Adding it as a new sprite, as opposed to replacing the existing sprite’s texture, makes it easier to crossfade back to the original image.
In GameScene.swift, add a new private property to the class:
private var selectionSprite = SKSpriteNode()
Add the following method:
func showSelectionIndicator(of cookie: Cookie) {
  if selectionSprite.parent != nil {
    selectionSprite.removeFromParent()
  }

  if let sprite = cookie.sprite {
    let texture = SKTexture(imageNamed: cookie.cookieType.highlightedSpriteName)
    selectionSprite.size = CGSize(width: tileWidth, height: tileHeight)
    selectionSprite.run(SKAction.setTexture(texture))

    sprite.addChild(selectionSprite)
    selectionSprite.alpha = 1.0
  }
}
This gets the name of the highlighted sprite image from the Cookie object and puts the corresponding texture on the selection sprite. Simply setting the texture on the sprite doesn’t give it the correct size but using an SKAction does.
You also make the selection sprite visible by setting its alpha to 1. You add the selection sprite as a child of the cookie sprite so that it moves along with the cookie sprite in the swap animation.
Add the opposite method, hideSelectionIndicator():
func hideSelectionIndicator() {
  selectionSprite.run(SKAction.sequence([
    SKAction.fadeOut(withDuration: 0.3),
    SKAction.removeFromParent()]))
}
This method removes the selection sprite by fading it out.
What remains, is for you to call these methods. First, in touchesBegan(_:with:), in the if let cookie = ... section — Xcode is helpfully pointing it out with a warning — add:
showSelectionIndicator(of: cookie)
And in touchesMoved(_:with:), after the call to trySwap(horizontalDelta:verticalDelta:), add:
hideSelectionIndicator()
There is one last place to call hideSelectionIndicator(). If the user just taps on the screen rather than swipes, you want to fade out the highlighted sprite, too. Add these lines to the top of touchesEnded():
if selectionSprite.parent != nil && swipeFromColumn != nil {
  hideSelectionIndicator()
}
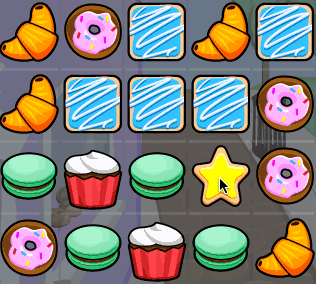
Build and run, and light up some cookies! :]
A Smarter Way to Fill the Array
When you run the game now, there may already be such chains on the screen. That’s no good; you only want matches after the user swaps two cookies or after new cookies fall down the screen.
Here’s your rule: Whenever it’s the user’s turn to make a move, no matches may exist on the board. To guarantee this is the case, you have to make the method that fills up the cookies array a bit smarter.
Go to Level.swift and find createInitialCookies(). Replace the single line that calculates the random cookieType with the following:
var cookieType: CookieType
repeat {
  cookieType = CookieType.random()
} while (column >= 2 &&
  cookies[column - 1, row]?.cookieType == cookieType &&
  cookies[column - 2, row]?.cookieType == cookieType)
  || (row >= 2 &&
    cookies[column, row - 1]?.cookieType == cookieType &&
    cookies[column, row - 2]?.cookieType == cookieType)
This piece of logic picks the cookie type at random and makes sure that it never creates a chain of three or more.
If the new random cookie causes a chain of three, the method tries again. The loop repeats until it finds a random cookie that does not create a chain of three or more. It only has to look to the left or below because there are no cookies yet on the right or above.
Run the app and verify that there are no longer any chains in the initial state of the game.

Track Allowable Swaps
You only want to let the player swap two cookies if it would result in either (or both) of these cookies making a chain of three or more.

You need to add some logic to the game to detect whether a swap results in a chain. To accomplish this, you’ll build a list of all possible moves after the level is shuffled. Then you only have to check if the attempted swap is in that list. You’re going to need a set of Swaps which means Swap must be Hashable.
Open Swap.swift and add Hashable to the struct declaration:
struct Swap: CustomStringConvertible, Hashable {
Next add the following methods to implement Hashable:
var hashValue: Int {
  return cookieA.hashValue ^ cookieB.hashValue
}

static func ==(lhs: Swap, rhs: Swap) -> Bool {
  return (lhs.cookieA == rhs.cookieA && lhs.cookieB == rhs.cookieB) ||
    (lhs.cookieB == rhs.cookieA && lhs.cookieA == rhs.cookieB)
}
You declare that a swap is equal if it refers to the same two cookies, regardless of the order.
In Level.swift, add a new property:
private var possibleSwaps: Set<Swap> = []
Again, you’re using a Set here instead of an Array because the order of the elements in this collection isn’t important. This Set will contain Swap objects. If the player tries to swap two cookies that are not in the set, then the game won’t accept the swap as a valid move.
At the start of each turn, you need to detect which cookies the player can swap. You’re going to make this happen in shuffle(). Still in Level.swift, replace that method with:
func shuffle() -> Set<Cookie> {
  var set: Set<Cookie>
  repeat {
    set = createInitialCookies()
    detectPossibleSwaps()
    print("possible swaps: \(possibleSwaps)")
  } while possibleSwaps.count == 0

  return set
}
As before, this calls createInitialCookies() to fill up the level with random cookie objects. But then it calls a new method that you will add shortly, detectPossibleSwaps(), to fill up the new possibleSwaps set.
detectPossibleSwaps() will use a helper method to see if a cookie is part of a chain. Add this method now:
private func hasChain(atColumn column: Int, row: Int) -> Bool {
  let cookieType = cookies[column, row]!.cookieType

  // Horizontal chain check
  var horizontalLength = 1

  // Left
  var i = column - 1
  while i >= 0 && cookies[i, row]?.cookieType == cookieType {
    i -= 1
    horizontalLength += 1
  }

  // Right
  i = column + 1
  while i < numColumns && cookies[i, row]?.cookieType == cookieType {
    i += 1
    horizontalLength += 1
  }
  if horizontalLength >= 3 { return true }

  // Vertical chain check
  var verticalLength = 1

  // Down
  i = row - 1
  while i >= 0 && cookies[column, i]?.cookieType == cookieType {
    i -= 1
    verticalLength += 1
  }

  // Up
  i = row + 1
  while i < numRows && cookies[column, i]?.cookieType == cookieType {
    i += 1
    verticalLength += 1
  }
  return verticalLength >= 3
}
A chain is three or more consecutive cookies of the same type in a row or column.

Given a cookie in a particular square on the grid, this method first looks to the left. As long as it finds a cookie of the same type, it increments horizontalLength and keeps going left. It then checks the other three directions.
Now that you have this method, you can implement detectPossibleSwaps(). Here’s how it will work at a high level:
- It will step through the rows and columns of the 2-D grid and simply swap each cookie with the one next to it, one at a time.
- If swapping these two cookies creates a chain, it will add a new Swap object to the list of possibleSwaps.
- Then, it will swap these cookies back to restore the original state and continue with the next cookie until it has swapped them all.
- It will go through the above steps twice: once to check all horizontal swaps and once to check all vertical swaps.
It’s a big one, so you’ll take it in parts!
First, add the outline of the method:
func detectPossibleSwaps() {
  var set: Set<Swap> = []

  for row in 0..<numRows {
    for column in 0..<numColumns {
      if let cookie = cookies[column, row] {

        // TODO: detection logic goes here
      }
    }
  }

  possibleSwaps = set
}
This is pretty simple: The method loops through the rows and columns, and for each spot, if there is a cookie rather than an empty square, it performs the detection logic. Finally, the method places the results into the possibleSwaps property. Ignore the two warnings for now.
The detection will consist of two separate parts that do the same thing but in different directions. First you want to swap the cookie with the one on the right, and then you want to swap the cookie with the one above it. Remember, row 0 is at the bottom so you’ll work your way up.
Add the following code where it says “TODO: detection logic goes here”:
// Have a cookie in this spot? If there is no tile, there is no cookie.
if column < numColumns - 1,
  let other = cookies[column + 1, row] {
  // Swap them
  cookies[column, row] = other
  cookies[column + 1, row] = cookie

  // Is either cookie now part of a chain?
  if hasChain(atColumn: column + 1, row: row) ||
    hasChain(atColumn: column, row: row) {
    set.insert(Swap(cookieA: cookie, cookieB: other))
  }

  // Swap them back
  cookies[column, row] = cookie
  cookies[column + 1, row] = other
}
This attempts to swap the current cookie with the cookie on the right, if there is one. If this creates a chain of three or more, the code adds a new Swap object to the set.
Now add the following code directly below the code above:
if row < numRows - 1,
  let other = cookies[column, row + 1] {
  cookies[column, row] = other
  cookies[column, row + 1] = cookie

  // Is either cookie now part of a chain?
  if hasChain(atColumn: column, row: row + 1) ||
    hasChain(atColumn: column, row: row) {
    set.insert(Swap(cookieA: cookie, cookieB: other))
  }

  // Swap them back
  cookies[column, row] = cookie
  cookies[column, row + 1] = other
}
This does exactly the same thing, but for the cookie above instead of on the right.
Now run the app and you should see something like this in the Xcode console:
possible swaps: [
swap type:SugarCookie square:(6,5) with type:Cupcake square:(7,5),
swap type:Croissant square:(3,3) with type:Macaroon square:(4,3),
swap type:Danish square:(6,0) with type:Macaroon square:(6,1),
swap type:Cupcake square:(6,4) with type:SugarCookie square:(6,5),
swap type:Croissant square:(4,2) with type:Macaroon square:(4,3),
. . .
Block Unwanted Swaps
Time to put this list of possible moves to good use. Add the following method to Level.swift:
func isPossibleSwap(_ swap: Swap) -> Bool {
  return possibleSwaps.contains(swap)
}
This looks to see if the set of possible swaps contains the specified Swap object.
Finally call the method in GameViewController.swift, inside handleSwipe(_:). Replace the existing handleSwipe(_:) with the following:
func handleSwipe(_ swap: Swap) {
  view.isUserInteractionEnabled = false

  if level.isPossibleSwap(swap) {
    level.performSwap(swap)
    scene.animate(swap) {
      self.view.isUserInteractionEnabled = true
    }
  } else {
    view.isUserInteractionEnabled = true
  }
}
Now the game will only perform the swap if it’s in the list of sanctioned swaps.
Build and run to try it out. You should only be able to make swaps if they result in a chain.

It’s also fun to animate attempted swaps that are invalid, so add the following method to GameScene.swift:
func animateInvalidSwap(_ swap: Swap, completion: @escaping () -> Void) {
  let spriteA = swap.cookieA.sprite!
  let spriteB = swap.cookieB.sprite!

  spriteA.zPosition = 100
  spriteB.zPosition = 90

  let duration: TimeInterval = 0.2

  let moveA = SKAction.move(to: spriteB.position, duration: duration)
  moveA.timingMode = .easeOut

  let moveB = SKAction.move(to: spriteA.position, duration: duration)
  moveB.timingMode = .easeOut

  spriteA.run(SKAction.sequence([moveA, moveB]), completion: completion)
  spriteB.run(SKAction.sequence([moveB, moveA]))

  run(invalidSwapSound)
}
This method is similar to animate(_:completion:), but here it slides the cookies to their new positions and then immediately flips them back.
In GameViewController.swift, change the else clause inside handleSwipe(_:) to:
scene.animateInvalidSwap(swap) {
  self.view.isUserInteractionEnabled = true
}
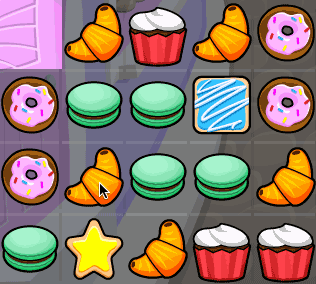
Now run the app and try to make a swap that won’t result in a chain:
Where to Go From Here?
You can download the project to this point using the Download Materials button at the top or bottom of this tutorial.
Good job on finishing the second part of this tutorial series. You’ve done a really great job laying down the foundation for your game.
In part 3, you’ll work on finding and removing chains, refilling the level with new yummy cookies after successful swipes and keeping score.
While you take a well-deserved break, take a moment to let us hear from you in the forums.
Credits: Free game art from Game Art Guppy. The music is by Kevin MacLeod. The sound effects are based on samples from freesound.org.
Portions of the source code were inspired by Gabriel Nica’s Swift port of the game.
The post How to Make a Game Like Candy Crush with SpriteKit and Swift: Part 2 appeared first on Ray Wenderlich.
How to Make a Game Like Candy Crush with SpriteKit and Swift: Part 2 published first on https://medium.com/@koresol
